Скачать с ютуб Step-by-Step Well Chlorination Process в хорошем качестве
Step-by-Step Well Chlorination Process
9 месяцев назад
Из-за периодической блокировки нашего сайта РКН сервисами, просим воспользоваться резервным адресом:
Загрузить через dTub.ru Загрузить через ClipSaver.ruСкачать бесплатно Step-by-Step Well Chlorination Process в качестве 4к (2к / 1080p)
У нас вы можете посмотреть бесплатно Step-by-Step Well Chlorination Process или скачать в максимальном доступном качестве, которое было загружено на ютуб. Для скачивания выберите вариант из формы ниже:
Загрузить музыку / рингтон Step-by-Step Well Chlorination Process в формате MP3:
Роботам не доступно скачивание файлов. Если вы считаете что это ошибочное сообщение - попробуйте зайти на сайт через браузер google chrome или mozilla firefox. Если сообщение не исчезает - напишите о проблеме в обратную связь. Спасибо.
Если кнопки скачивания не
загрузились
НАЖМИТЕ ЗДЕСЬ или обновите страницу
Если возникают проблемы со скачиванием, пожалуйста напишите в поддержку по адресу внизу
страницы.
Спасибо за использование сервиса savevideohd.ru
Step-by-Step Well Chlorination Process
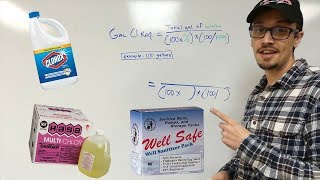
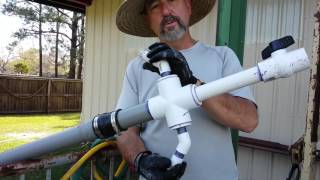
Good morning, friends! Today, we're diving into the process of chlorinating a well. I'll walk you through each step to ensure you know how to do it safely and effectively. We start in the utility room, checking the pressure tank and water treatment systems, ensuring they’re in bypass mode to protect the water softener from chlorine damage. Next, we inspect the well casing, noting any issues such as missing bolts or holes, which can allow bacteria back in. Using a hacksaw to cut zip ties and an impact to remove bolts, we prepare the well for chlorination. It's crucial to turn off the well pump power to avoid accidents. After examining the gasket and cap, we measure and add chlorine tablets based on the well's depth. We let the chlorine sit and then recirculate it to clean the well casing thoroughly. Running water for about 30 minutes helps ensure everything is sanitized. Testing with strips, we achieve a good chlorine level and proceed to flush the cold water fixtures in the house, avoiding the hot water heater to prevent damage. Finally, we secure the cap with new bolts and let the chlorinated water sit for a day to kill bacteria. Properly draining the hose and avoiding chlorine contact with plants or drinking water is essential. If you've dealt with bacteria in your well, share your experiences in the comments. For more well and septic system content, like and subscribe for daily updates. Till next time!
Comments