Скачать с ютуб How to connect Uno R4 Wi-Fi to the Arduino IoT Cloud | LED Control в хорошем качестве
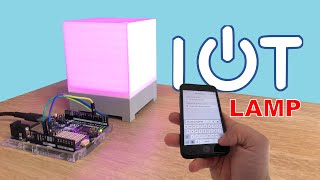
How to connect Uno R4 Wi-Fi to the Arduino IoT Cloud | LED Control
1 год назад
Из-за периодической блокировки нашего сайта РКН сервисами, просим воспользоваться резервным адресом:
Загрузить через dTub.ru Загрузить через ClipSaver.ruСкачать бесплатно How to connect Uno R4 Wi-Fi to the Arduino IoT Cloud | LED Control в качестве 4к (2к / 1080p)
У нас вы можете посмотреть бесплатно How to connect Uno R4 Wi-Fi to the Arduino IoT Cloud | LED Control или скачать в максимальном доступном качестве, которое было загружено на ютуб. Для скачивания выберите вариант из формы ниже:
Загрузить музыку / рингтон How to connect Uno R4 Wi-Fi to the Arduino IoT Cloud | LED Control в формате MP3:
Роботам не доступно скачивание файлов. Если вы считаете что это ошибочное сообщение - попробуйте зайти на сайт через браузер google chrome или mozilla firefox. Если сообщение не исчезает - напишите о проблеме в обратную связь. Спасибо.
Если кнопки скачивания не
загрузились
НАЖМИТЕ ЗДЕСЬ или обновите страницу
Если возникают проблемы со скачиванием, пожалуйста напишите в поддержку по адресу внизу
страницы.
Спасибо за использование сервиса savevideohd.ru
How to connect Uno R4 Wi-Fi to the Arduino IoT Cloud | LED Control
In this video, we'll show you how to connect the Arduino Uno R4 Wi-Fi to the Arduino IoT Cloud, enabling remote LED control from your smartphone or computer. This project is perfect for beginners looking to get started with IoT and cloud-based Arduino projects. In this video, you'll learn: How to set up the Arduino Uno R4 Wi-Fi with the Arduino IoT Cloud How to connect an LED to the Uno R4 Wi-Fi How to control the LED remotely using the Arduino IoT Cloud dashboard Components Used: Arduino Uno R4 Wi-Fi LED 220Ω Resistor Breadboard and jumper wires Steps: Set up your Arduino IoT Cloud account. Connect the Arduino Uno R4 Wi-Fi to the cloud. Program the board to control the LED. Use the Arduino IoT Cloud dashboard to turn the LED on and off. Links and Resources: Arduino IoT Cloud: https://create.arduino.cc/iot Code and Schematics: https://github.com/Valentim-bot/Contr... Make sure to like, subscribe, and turn on notifications so you don’t miss future tutorials on Arduino projects, IoT, and more! Dont Forget to install :Arduino Create Agent #ArduinoIoTCloud #ArduinoUnoR4WiFi #LEDControl #IoTProjects #SmartHome #DIYElectronics
Comments