Скачать с ютуб Pulover's Macro Creator Tutorial: Image and Pixel search в хорошем качестве
Pulover's Macro Creator Tutorial: Image and Pixel search
11 лет назад
Из-за периодической блокировки нашего сайта РКН сервисами, просим воспользоваться резервным адресом:
Загрузить через dTub.ru Загрузить через ClipSaver.ruСкачать бесплатно Pulover's Macro Creator Tutorial: Image and Pixel search в качестве 4к (2к / 1080p)
У нас вы можете посмотреть бесплатно Pulover's Macro Creator Tutorial: Image and Pixel search или скачать в максимальном доступном качестве, которое было загружено на ютуб. Для скачивания выберите вариант из формы ниже:
Загрузить музыку / рингтон Pulover's Macro Creator Tutorial: Image and Pixel search в формате MP3:
Роботам не доступно скачивание файлов. Если вы считаете что это ошибочное сообщение - попробуйте зайти на сайт через браузер google chrome или mozilla firefox. Если сообщение не исчезает - напишите о проблеме в обратную связь. Спасибо.
Если кнопки скачивания не
загрузились
НАЖМИТЕ ЗДЕСЬ или обновите страницу
Если возникают проблемы со скачиванием, пожалуйста напишите в поддержку по адресу внизу
страницы.
Спасибо за использование сервиса savevideohd.ru
Pulover's Macro Creator Tutorial: Image and Pixel search
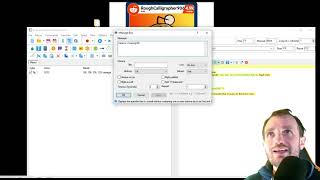
Watch the tutorials for PMC version 5: • Pulover's Macro Creator v5 Tutorial 1 Transcription: With Pulover's Macro Creator you can take screenshots of part of the screen and create a command to search for that image. You can also search for a determined pixel color. To mark a region press and hold the right button on the mouse and drag it to create a rectangle. Release to get the position. Click on the button with the camera to take a screenshot. Use the same method to mark the area. To create more precise screenshots go to the Options window and select "Press Enter to capture". You can also change the line width. Now after releasing the mouse button you can move and resize the rectangle using the keyboard pressing Ctrl+Arrow keys and Shift+Arrow keys. You can also mark the region of a control by clicking and releasing over a control area without moving the mouse, and mark the area of the window by doing the same in an area without a control. You can also load an image file from your computer. The "If found" and "If not found" options determine the action taken by the program on each situation. The Repeat until option creates a loop that will repeat the search until the image or pixel is found or not found. You can set the delay between searches. If you want to execute different or more commands after a result you need to add an If Statement. Mark this option to create one automatically. When the image or pixel is found the coordinates are saved to the variables FoundX and FoundY. You can use those variables inside other commands such as Mouse actions by enclosing them in percent signs Notice that the coordinates returned for an image search will point to the upper-right corner, not the center. To fix that you can increment the values before using them. For that use the Variables window with the Add or Subtract operators or check the Expression option and use the Assign operator. The commands added between the If Statement and the EndIf line will only be executed if the result of the search matches the criteria, which can be "If image/pixel found" or "If image/pixel not found". An Else Statement can also be used inside the block. Pixel search is basically the same. You can pick a color from your desktop or from the Color Pick dialogue.
Comments