Скачать с ютуб How to build a LIGHT-UP DRESS in one day with programmable LEDs в хорошем качестве
How to build a LIGHT-UP DRESS in one day with programmable LEDs
4 года назад
Скачать бесплатно How to build a LIGHT-UP DRESS in one day with programmable LEDs в качестве 4к (2к / 1080p)
У нас вы можете посмотреть бесплатно How to build a LIGHT-UP DRESS in one day with programmable LEDs или скачать в максимальном доступном качестве, которое было загружено на ютуб. Для скачивания выберите вариант из формы ниже:
Загрузить музыку / рингтон How to build a LIGHT-UP DRESS in one day with programmable LEDs в формате MP3:
Если кнопки скачивания не
загрузились
НАЖМИТЕ ЗДЕСЬ или обновите страницу
Если возникают проблемы со скачиванием, пожалуйста напишите в поддержку по адресу внизу
страницы.
Спасибо за использование сервиса savevideohd.ru
How to build a LIGHT-UP DRESS in one day with programmable LEDs
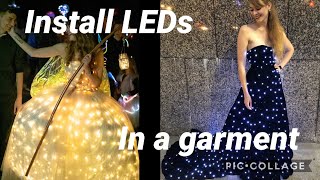
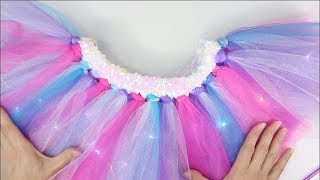
Going somewhere tomorrow but you've got nothing to wear? Follow along as I create this twinkling wearable LED dress in just one evening. It's not the neatest piece of work, but for an easy overnight electronics project, it's got the wow factor. I started with a bunch of addressable RGB LEDs. I wanted to get neopixels, but they're expensive and take longer to ship where I live, so I opted for 100 cheap knock-off neopixels instead. I soldered 12 of them into a long chain, then decided where on my dress they were going to go. I cut some little holes, popped my addressable LEDs behind them and then sewed around the disk of the little board the LEDs are mounted on to secure them. The sewing was kinda messy, but it didn't matter because the abstract black and white pattern on the fabric hid the worst of it! The next step is to hook your LED strip up to a micro controller. I used an Arduino Uno. The code was mainly an example sketch from the Adafruit website, but I added my own custom animation to make the lights act like an hourglass. You can find the Adafruit code here: https://learn.adafruit.com/adafruit-n... (I'll be posting something about the part of the code I wrote on my website, hannahmakes.com, so keep checking back for that.) The only thing you'll need to change in the example code is one number: the number of LEDs in the strip. Eventually there will be wiring diagrams etc. on my website too, but basically, respect the arrows. Each LED has an in and out for +ve, -ve and data, just make a big long chain of them connecting the three "out"s of the previous LED to the three "in"s of the next. Then, if you've not got many LEDs, you can connect it all directly to your Arduino – the 5v in can connect to the Arduino 5v supply, -ve goes to Arduino's ground and the data wire goes to 6 (this is the default in the code but you can change it if you like). ⚙️✨Things you might need for this project:✨⚙️ (As an Amazon Associate I earn from qualifying purchases made with these affiliate links, but it doesn't cost you any extra 👍) Addressable LEDs UK: https://amzn.to/2OlyRKF US: https://amzn.to/3qbyb8G Arduino UK: https://amzn.to/3tLNzuL US: https://amzn.to/3aXnbWp 🤖✨ What's in this video? ✨🤖 -soldering in unicorn slippers -pinning pieces of paper to my actual body -the best video transition I've ever created, at 06:37 #DIY #wearables #LEDs #electronics project #HannahMakes 🤖✨Join me elsewhere on the internet ✨🤖 ➡️Twitter: / hannahmakes ➡️Website: http://www.hannahmakes.com ➡️Enquiries [email protected] 🤖✨SUPPORT ME ON PATREON✨🤖 ➡️ / hannahmakes Music from YouTube Audio Library Additional sound effects from https://www.zapsplat.com
Comments