Скачать с ютуб led flasher circuit with optocoupler в хорошем качестве
led flasher circuit with optocoupler
4 года назад
Скачать бесплатно led flasher circuit with optocoupler в качестве 4к (2к / 1080p)
У нас вы можете посмотреть бесплатно led flasher circuit with optocoupler или скачать в максимальном доступном качестве, которое было загружено на ютуб. Для скачивания выберите вариант из формы ниже:
Загрузить музыку / рингтон led flasher circuit with optocoupler в формате MP3:
Если кнопки скачивания не
загрузились
НАЖМИТЕ ЗДЕСЬ или обновите страницу
Если возникают проблемы со скачиванием, пожалуйста напишите в поддержку по адресу внизу
страницы.
Спасибо за использование сервиса savevideohd.ru
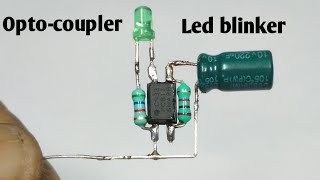
led flasher circuit with optocoupler
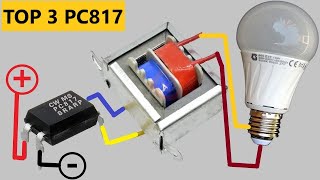
led flasher circuit with optocoupler : #optocoupler_led_blinker #ledlights #easy_led_flasher you learn how to make a simple flashing circuit with the fewest parts. This electronic circuit turns the LED on and off, and the power supply is a battery. In this DIY project video , I'll show you how to build a simple and effective led blinking circuit using an optocoupler. This circuit is designed to create a blinking effect with minimal components, including a PC817 optocoupler, a 10k ohm resistor, a 1k ohm resistor, a 220 microfarad 25V capacitor, and a 5mm LED. With its low part count, this circuit is perfect for beginners who want to learn more about electronics. Plus, it can operate within a wide voltage range of 9-24V, which means it can be powered by a 9V battery or a car battery. Throughout the video, I'll explain each component and its function in the circuit. I'll also provide step-by-step instructions on how to assemble the circuit, making it easy for anyone to follow along. Whether you're a beginner or an experienced electronics enthusiast, this video is for you. So sit back, relax, and join me as we build a fun and exciting LED flasher circuit together. 00:00 install Optocoupler 00:36 install Resistor 1k 01:11 install Capacitor 220uF 25V 02:01 install Resistor 10k 02:42 install LED 03:17 install Battery connector 03:42 schematic 03:53 circuit testing #led_flashlight #optocoupler_led_blinker #12v_blinking_led_lights #led_strobe_light #DIY_led_flasher
Comments