Скачать с ютуб Autodesk inventor Create Spiral Staircase with Sheet Metal Exercise 46 в хорошем качестве
Autodesk inventor Create Spiral Staircase with Sheet Metal Exercise 46
1 год назад
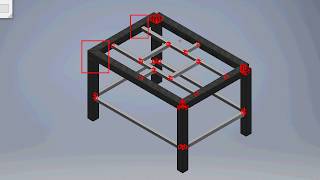
bolted connection fastner washer nuts bolt
Parametric modeling
Architectural design
Mechanical design
Assembly modeling
Precision engineering
3D modeling
Simulation and analysis
sketch
Autocad drawing
dimention units
sheet metal
extrud
sweep
sweet cut
emboss
twisted
fillet
revolve
coil
Circular Pattern1
rectangular pattern
loft
welding fillet
stages
edige
industrial Stairs
Platform Design
Elbow
Joint
Sheet
Metal
bolt
SILO
staircase
spiral
Thickness
Solid
Part
Из-за периодической блокировки нашего сайта РКН сервисами, просим воспользоваться резервным адресом:
Загрузить через dTub.ru Загрузить через ClipSaver.ruСкачать бесплатно Autodesk inventor Create Spiral Staircase with Sheet Metal Exercise 46 в качестве 4к (2к / 1080p)
У нас вы можете посмотреть бесплатно Autodesk inventor Create Spiral Staircase with Sheet Metal Exercise 46 или скачать в максимальном доступном качестве, которое было загружено на ютуб. Для скачивания выберите вариант из формы ниже:
Загрузить музыку / рингтон Autodesk inventor Create Spiral Staircase with Sheet Metal Exercise 46 в формате MP3:
Роботам не доступно скачивание файлов. Если вы считаете что это ошибочное сообщение - попробуйте зайти на сайт через браузер google chrome или mozilla firefox. Если сообщение не исчезает - напишите о проблеме в обратную связь. Спасибо.
Если кнопки скачивания не
загрузились
НАЖМИТЕ ЗДЕСЬ или обновите страницу
Если возникают проблемы со скачиванием, пожалуйста напишите в поддержку по адресу внизу
страницы.
Спасибо за использование сервиса savevideohd.ru
Autodesk inventor Create Spiral Staircase with Sheet Metal Exercise 46
Creating a spiral staircase with sheet metal can be a fascinating project. Here's a simplified step-by-step guide to get you started: Design and Planning: Sketch out your design on paper, including dimensions for the staircase's height, diameter, number of steps, and the angle of rotation. Decide on the type of sheet metal you want to use, considering its thickness, strength, and appearance. Materials and Tools: Sheet metal (preferably pre-cut to the required dimensions) Metalworking tools such as shears, a brake press, a welding machine, and a grinder Safety equipment including gloves, goggles, and a welding helmet Cutting the Metal: Use shears or a cutting tool to cut the sheet metal into the required shapes for the steps and the central column. Ensure precise measurements and clean cuts for accuracy in assembly. Forming the Steps: Use a brake press or other bending tools to form each step. The steps should be curved to match the spiral shape of the staircase. Depending on your design, you may need to add reinforcement to the steps for stability. Constructing the Central Column: Cut and shape a metal rod or pipe to serve as the central column of the staircase. Weld or bolt the steps onto the central column at regular intervals, ensuring they are evenly spaced and aligned. Assembly and Welding: Assemble the steps around the central column, starting from the bottom and working your way up. Use clamps or other securing methods to hold the steps in place during welding. Weld each step securely to the central column and any necessary reinforcements. Finishing Touches:
Comments