Скачать с ютуб "The EASIEST Way to Draw a Girl Portrait (Loomis Method)" в хорошем качестве
"The EASIEST Way to Draw a Girl Portrait (Loomis Method)"
8 дней назад
Из-за периодической блокировки нашего сайта РКН сервисами, просим воспользоваться резервным адресом:
Загрузить через dTub.ru Загрузить через ClipSaver.ruСкачать бесплатно "The EASIEST Way to Draw a Girl Portrait (Loomis Method)" в качестве 4к (2к / 1080p)
У нас вы можете посмотреть бесплатно "The EASIEST Way to Draw a Girl Portrait (Loomis Method)" или скачать в максимальном доступном качестве, которое было загружено на ютуб. Для скачивания выберите вариант из формы ниже:
Загрузить музыку / рингтон "The EASIEST Way to Draw a Girl Portrait (Loomis Method)" в формате MP3:
Роботам не доступно скачивание файлов. Если вы считаете что это ошибочное сообщение - попробуйте зайти на сайт через браузер google chrome или mozilla firefox. Если сообщение не исчезает - напишите о проблеме в обратную связь. Спасибо.
Если кнопки скачивания не
загрузились
НАЖМИТЕ ЗДЕСЬ или обновите страницу
Если возникают проблемы со скачиванием, пожалуйста напишите в поддержку по адресу внизу
страницы.
Спасибо за использование сервиса savevideohd.ru
"The EASIEST Way to Draw a Girl Portrait (Loomis Method)"
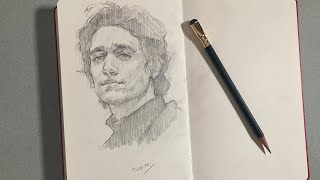
The Loomis method is a popular technique for drawing realistic portraits, developed by Andrew Loomis. It provides a structured approach to constructing the human head, ensuring accurate proportions and perspective. Here’s a step-by-step description to guide you in drawing a portrait using the Loomis method: *Step 1: Draw the Basic Head Shape* 1. Start with a *circle* to represent the cranium (top of the head). 2. Draw a *horizontal line* through the center of the circle to mark the brow line. 3. Add a *vertical line* down the center of the circle to establish the face’s symmetry. --- *Step 2: Define the Jawline* 1. From the bottom of the circle, draw two lines angling downward to create the jaw. 2. Connect these lines at the bottom with a *rounded curve* to form the chin. 3. The length of the jawline should be roughly equal to the radius of the circle. --- *Step 3: Divide the Face into Proportions* 1. Divide the head into **three equal horizontal sections**: Top section: Hairline to brow line. Middle section: Brow line to the base of the nose. Bottom section: Base of the nose to the chin. 2. Add a *horizontal line* halfway between the brow line and the chin to mark the placement of the eyes. --- *Step 4: Place the Facial Features* 1. **Eyes**: Position the eyes along the horizontal line you just drew. The space between the eyes should be roughly the width of one eye. 2. **Nose**: The base of the nose aligns with the bottom of the middle section. 3. **Mouth**: Place the mouth halfway between the base of the nose and the chin. 4. **Ears**: The top of the ears align with the brow line, and the bottom aligns with the base of the nose. --- *Step 5: Add Details and Refine* 1. Sketch the *eyebrows* just above the brow line. 2. Define the *cheekbones* by drawing subtle curves from the sides of the head to the jawline. 3. Add the *hairline* slightly above the top horizontal line, following the curvature of the head. 4. Refine the jawline and chin to match the subject’s unique features. --- *Step 6: Shade and Add Depth* 1. Use light pencil strokes to block in shadows and highlights. 2. Pay attention to the light source and shade accordingly to create a three-dimensional effect. 3. Add texture to the hair, skin, and other features for realism. --- *Tips for Success* Practice drawing the Loomis head from different angles (front, side, three-quarter view). Use reference photos to study proportions and features. Keep your lines light and adjustable until you’re satisfied with the structure. By following these steps, you’ll create a well-proportioned and realistic portrait using the Loomis method! pencil #drawingportrait #drawing #art #portrait #sketch #pencildrawing #artwork #portraitdrawing #draw #artist #pencil #drawings #pencilart #sketchbook #drawingart #pencilportrait #drawingoftheday #drawingsketch #instaart #pencilsketch #illustration #realism #artoftheday #drawingpencil #drawingchallenge #drawingfaces #portraitart #graphitedrawing #artistsoninstagram #painting
Comments