Скачать с ютуб War Thunder! How To Make Custom Skins Without Photoshop! [Outdated] в хорошем качестве
War Thunder! How To Make Custom Skins Without Photoshop! [Outdated]
10 лет назад
Скачать бесплатно War Thunder! How To Make Custom Skins Without Photoshop! [Outdated] в качестве 4к (2к / 1080p)
У нас вы можете посмотреть бесплатно War Thunder! How To Make Custom Skins Without Photoshop! [Outdated] или скачать в максимальном доступном качестве, которое было загружено на ютуб. Для скачивания выберите вариант из формы ниже:
Загрузить музыку / рингтон War Thunder! How To Make Custom Skins Without Photoshop! [Outdated] в формате MP3:
Если кнопки скачивания не
загрузились
НАЖМИТЕ ЗДЕСЬ или обновите страницу
Если возникают проблемы со скачиванием, пожалуйста напишите в поддержку по адресу внизу
страницы.
Спасибо за использование сервиса savevideohd.ru
War Thunder! How To Make Custom Skins Without Photoshop! [Outdated]
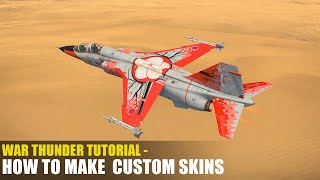
Website 1: http://image.online-convert.com/conve... Website 2: http://pixlr.com/editor/ Website 3: http://image.online-convert.com/conve... ------------------------------------------------------------------------------------- Quick Guide: Step 1: Go into warthunder game pick plane you want to customize. Step 2: Go to Customize click pen tool to create custom skin folder for that plane located by the decal slots. Step 3: STEAM USERS: FILE LOCATION: Computer/Local Disk (C:)/Program Files (x86)/Steam/SteamApps/common/War Thunder/UserSkins Step 4: PEOPLE WHO DOWNLOADED WAR THUNDER FROM WEBSITE: Computer/Local Disk (C:)/Program Files (x86)/WarThunder/UserSkins Step 5: When inside user skins go to the planes file you created the template for eg: template_p-38g Step 6: Copy the first TGA file to desktop or place you will remember where it is. eg: p_38g_c.tga. Step 7: Go to first website and convert tga to png file. Step 8: go to second website pixlr. import and customize the png file to your liking. Step 9: save the file as the png to desktop or somewhere you will remember. Step 10: go to third website. Convert back to tga file format. Step 11: go back to the UserSkins folder and into the template folder delete the first tga file THE ONE YOU COPIED!!! and put the new tga file in there making sure you named it the same exact thing!! Step 11: Go back into war thunder to the plane you customized. hit the refresh button by the decal slots. Step 12: click on the disabled button where user skins is and click the template under disable! Step 13 Enjoy!
Comments
![WAR THUNDER [TUTORIAL] How To Paint Your Own Custom Plane And Tank Skins on PC](https://i.ytimg.com/vi/Wd20aDedR4k/mqdefault.jpg)